
Create & Configure the Purchasing Application
Key Lesson: In Lowgile, an application is created as a Module. The Purchasing application is created and configured through the Module object in Lowgile Studio.
The first step is to create the Purchasing Module. This becomes the application you will extend throughout the tutorial as Entities, Screens, the Processes, and supporting configuration are added.
Creating the Module also gives the application its initial structure. Before adding any purchasing-specific functionality, you will build and open this base application to confirm that it is configured correctly.
1. Create the Purchasing application
Section titled “1. Create the Purchasing application”- In the main navigation, select Design.
- In the Design area, select Module.
- Select + to create a new application.
- Enter
Purchasingas the Module ID, then select OK to create the application.
Lowgile then opens the Module editor automatically. No changes are required at this stage, so close the editor.
When the Module is created, Lowgile also creates the default Screens that provide the initial application structure: Home, MainLayout, Header, Sidebar, and User profile.
You do not yet need to configure these Screens. They provide the application shell that will be extended as the Purchasing application develops.
2. Configure the application build
Section titled “2. Configure the application build”The Purchasing application has now been created. The next step is to add it to the build configuration and activate it so Lowgile can build the application.
- In the main navigation, select Configure.
- Select Build.
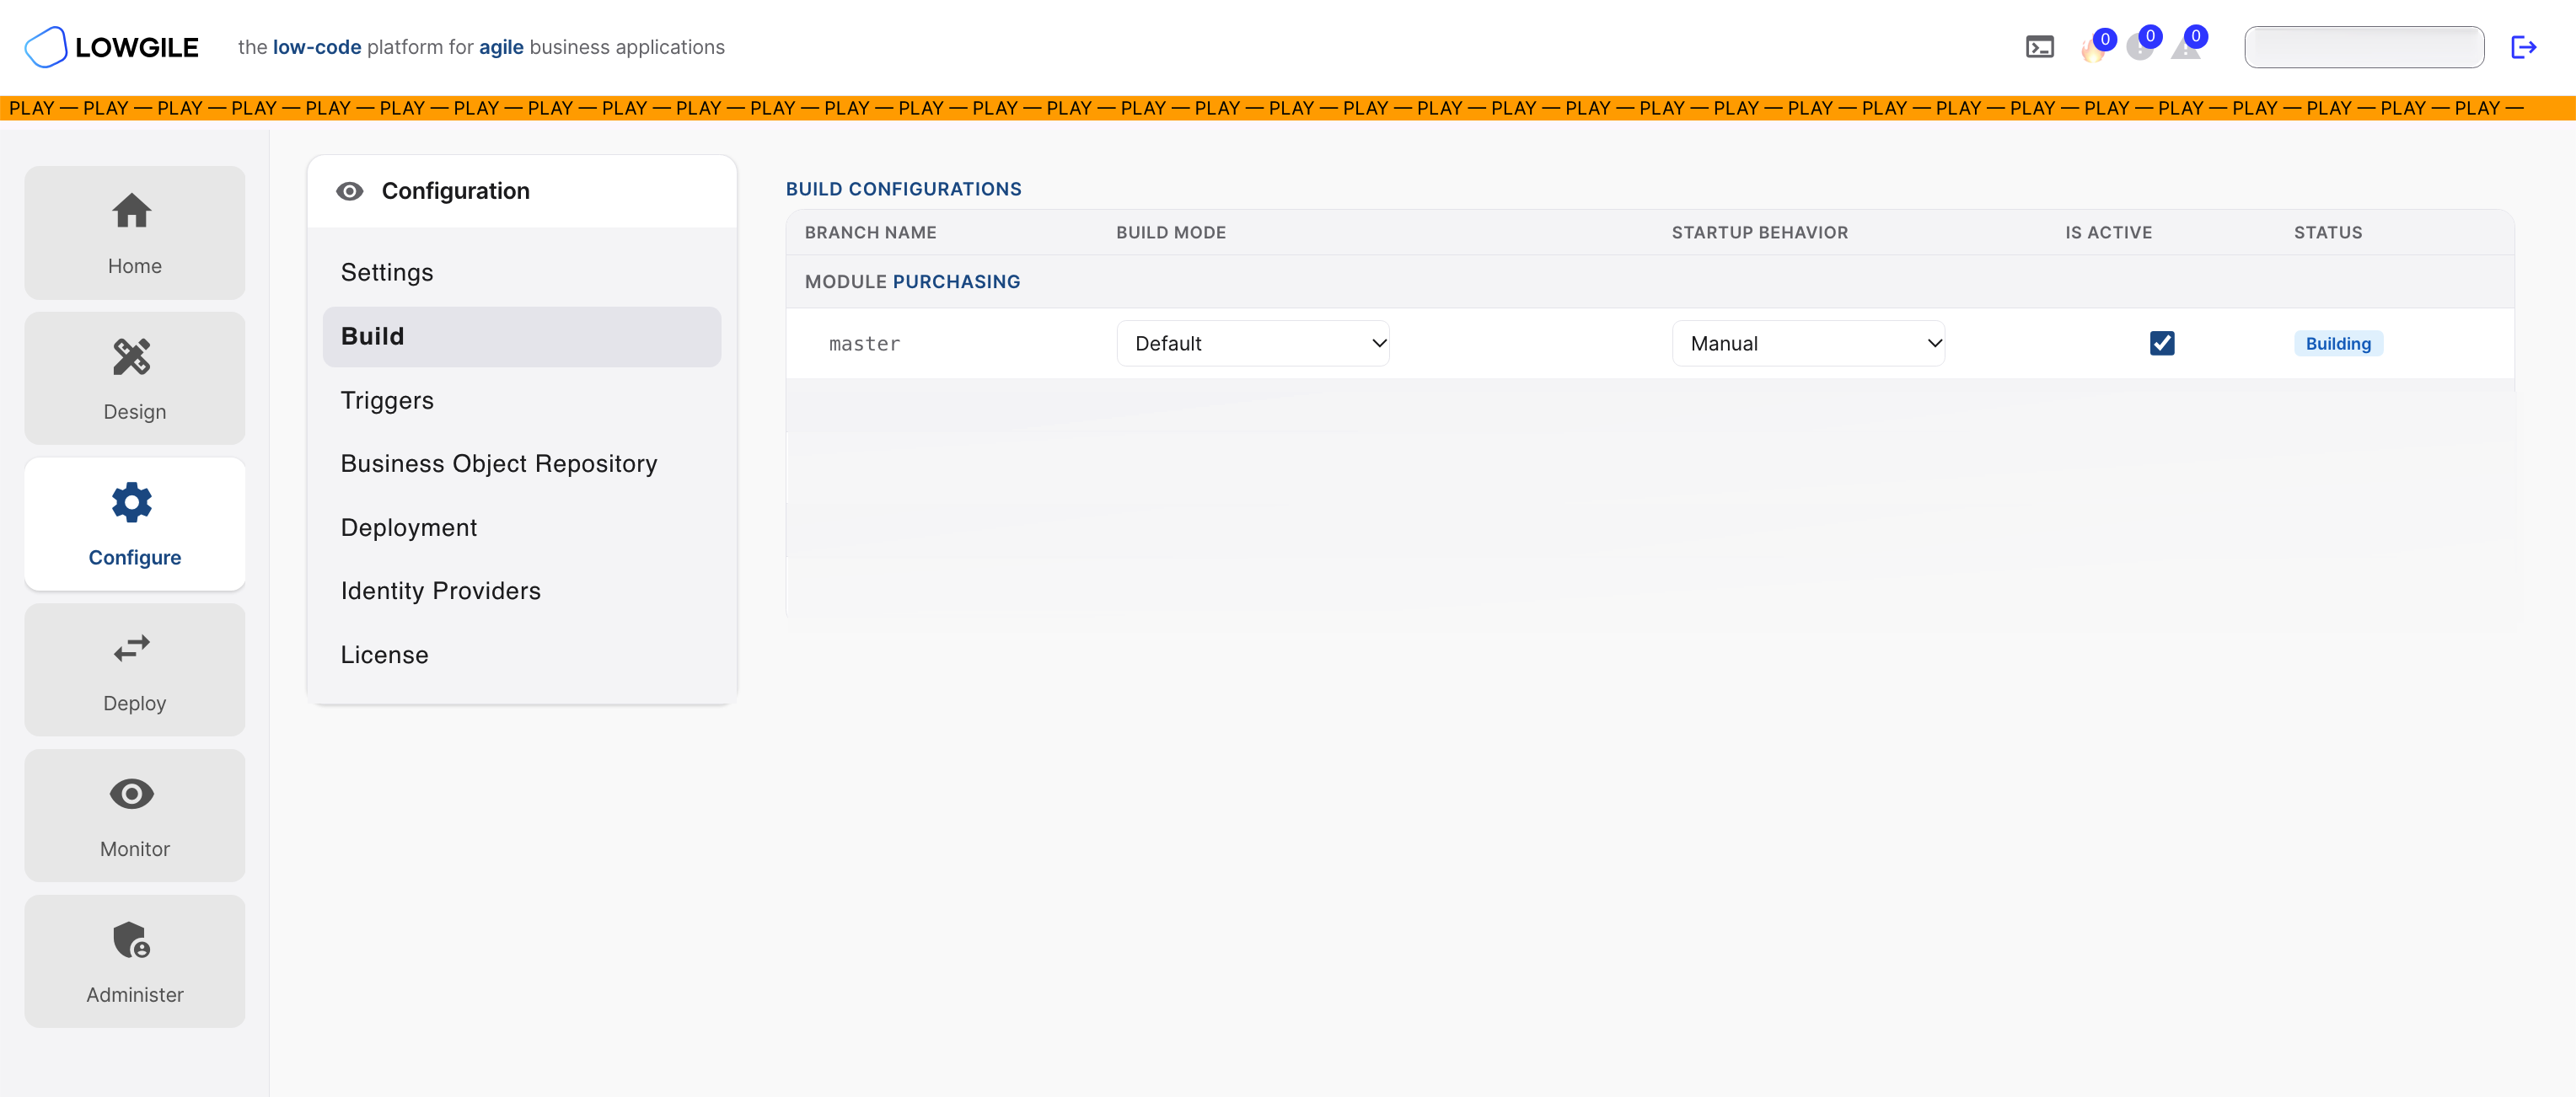
- Locate the
PurchasingModule and configure its build as follows:
| Field | Value | Description |
|---|---|---|
| Branch Name | master | Specifies the branch used for the application build. |
| Build Mode | Default | Uses the default build mode for the application. |
| Startup Behavior | Manual | The application is started manually. |
| Is Active | Selected | Activates the build configuration for the Purchasing application. |
Selecting Is Active starts the first build of the Purchasing application.
Insight
The initial build typically takes between 1 and 2 minutes. Later builds will only take a few seconds.
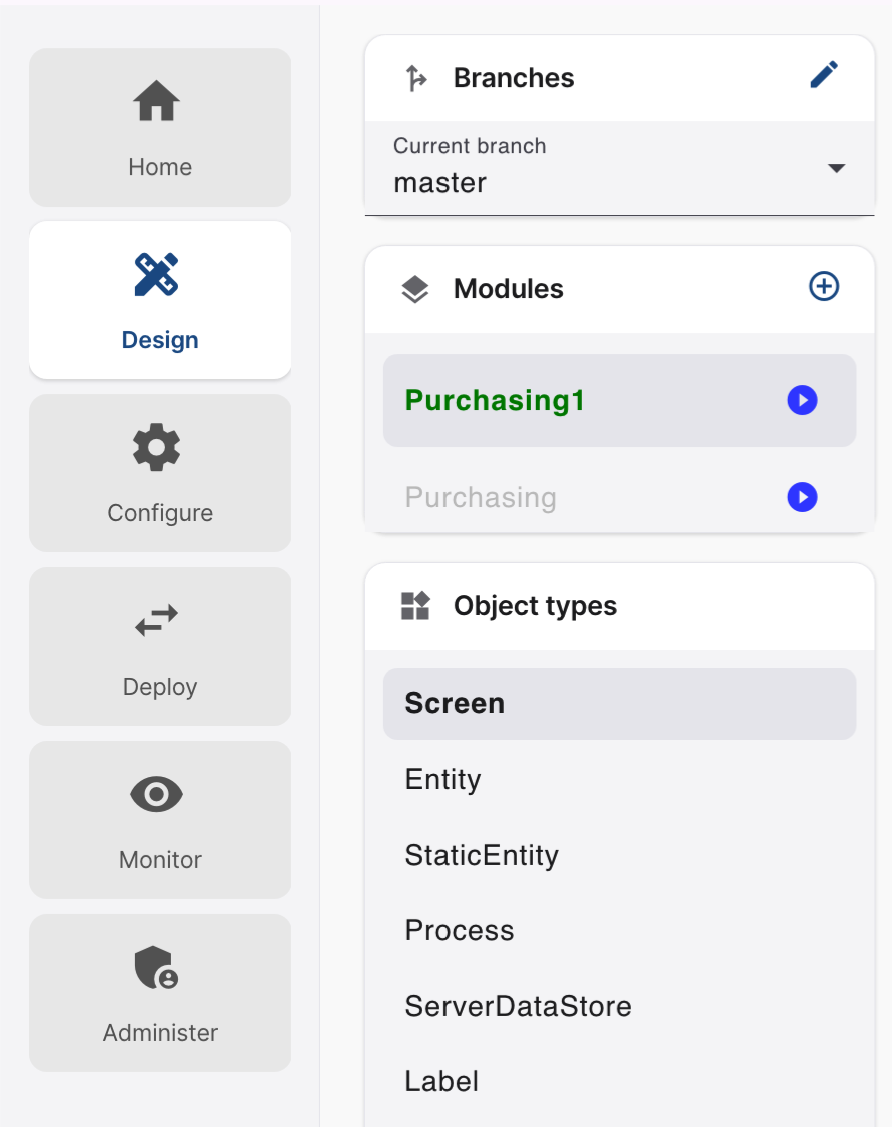
The application name in the Design area indicates the current build status:
- Blue: The application is building.
- Green: The build completed successfully.
- Red: The build failed.
3. Verify the application
Section titled “3. Verify the application”Before adding the purchasing data model, confirm that the application has built successfully and can be opened.
- In Design, locate the
Purchasingapplication. - Confirm that the application name is shown in green.
- Select the
Purchasingapplication. - Select the Play icon.
The Purchasing application opens successfully and displays its initial application shell.
At this stage, the application does not yet contain the purchasing data model or the custom Screens created later in the tutorial.
If the application is still blue, the build is still running. Wait for the build to complete before continuing.
If the application name remains blue for an unusually long time and appears to be stuck in a build loop, right-click the application name and select Rebuild whole Module to restart the build.
If the application is red, the build failed. Select the red exclamation mark to view the build-error information, review the application and build configurations, and correct the reported error before proceeding to the next tutorial step.